Tuesday, October 27, 2009

Memory-Wire Bracelet


I broke down and bought some memory wire. For a long time I resisted it because I just don’t like making bracelets. I don’t have much luck selling them and they just seem to take up space. It was on a whim that I actually bought the memory wire in bracelet size. I figured it would give me the opportunity to make bracelets in a simple and quick way. And I hate to admit it, but I am hooked!


This blue bracelet is one of my first experiments with the memory wire. It is a simple pattern of glass beads in a lovely shade of blue. The second picture illustrates how I simply twisted the wire in to a basic loop to hold the beads on the wire. There are end beads specifically designed for memory wire, but I have found that twisting the wire works just fine.


Happy Crafting All!

Luxurious Face Cloths


Face cloths are so easy and versatile. They make a great addition to gift baskets or combined with scented soaps for a quick simple gift. Similar to dish cloths, face cloths are a basic crocheted square made of luxurious chenille yarn. Watch for store brands and sales to stock up on skeins of chenille as it can get a little spendy. I use the smaller skeins and will usually get one cloth from each skein.


With the holidays right around the corner, it’s time to start considering gifts and crafters love giving what they make. Simple gift baskets are a great way to combine small items like face cloths with other home made and store bought items for memorable and useful gifts!


Happy Crafting All!

Friday, October 16, 2009

Simple Clip Magnets

Aren't these clip magnets adorable? They were sooo easy to make too. All it takes is some wooden clothes pins, pretty papers (I used a photograph on the front printed on plain white paper and scrap scrapbooking paper on the back), some .5" magnets and Modge Podge.

Use the Modge Podge to adhere the papers to each side. Once dry coat the paper and side of the clip with Modge Podge to seal; when dry coat the side. Be careful to open the clip between each sealing coat - it will get stuck closed but should easily be opened again. After the Modge Podge as completely dried, I used a gel LocTite Super Glue to adhere the magnets. And that's it! Super simple, super quick. I plan to make these for shows next year. Each magnet should securely hold 2-3 sheets of paper without the magnets giving out.

Happy Crafting All!

Thursday, October 15, 2009

A Spooky Greeting


It is the time of year to plan for the sugar-fest known as Halloween! Are you having a party? Maybe just want to say hi to former ghoul you tricked and treated with? A simple little handmade card is a great way to send that greeting or invitation.

The above card was so quick and simple to make that I whipped it up in about five minutes. I glued the orange cardstock paper to the blank card, used two different $1 Michael's stamps and some black metallic dots ($1 at Joann's) and I was done. These would make great invitations to Halloween party because you could make as many as you need in a very short amount of time. Then you can focus on all the other frighteningly fun things about Halloween!

Happy Crafting All!
Posted by Picasa

Wednesday, October 14, 2009

Another Crazy Quilt

This is the quilt that I made for my husband as a birthday present. I love this quilt myself - so snuggly and so easy. It is another design from the Crazy Short Cut Quilts book. He loves it because it actually covers him.

Next week I will post begin posting more information on how to make these quilts, so you can try one for yourself!

Happy Crafting All!

Tuesday, October 13, 2009

Copper Bracelet

Since I signed up for the Wire-Sculpture.com newsletter, I periodically receive interesting new patterns to try from some of their wonderfully talented designers. The above bracelet is one of those patterns and I must say, for never having made anything like that before, I think it turned out rather well.

The wire I had on hand was a little thicker than what the pattern called for, but I made it work. The main part of the bracelet (top picture) was a little challenging because of the way the wire was twisted back on itself, and because I was using a thicker wire I was not able to get the rows as straight and uniform as I would have liked. The links, on the other hand, (bottom picture) came together beautifully. This is a bracelet I can see myself making many times and in many different colors to match a mood or outfit!

Happy Crafting All!

Monday, October 12, 2009

Dish Cloths

Dish cloths are the amazing little towels that everyone needs but few people actually ever think about. What makes them fabulous for crocheters is they are the perfect medium for trying new stitches and patterns. The dish cloth is essentially a swatch of material - for crochet and knit, think about a 10"x10" square.

What makes them practical is that they don't need to be out of a fancy, high-end yarn. A worsted weight or 100% cotton yarn will work the best. Lily Original Sugar 'n Cream is what I used for the cloths show above, though I've heard a worsted weight such as Red Heart works great as well for scrubbing.

Every one needs dish cloths. They may not be practical to mass produce to sell at a show, but they can be personalized to fit a friend's kitchen decor and given as part of gift basket or house warming gift.

Happy Crafting All!

Friday, October 9, 2009

'Tis Almost The Season...

Christmas and the holiday season are right around the corner. It is the time of year that we are all a little more generous to strangers. We give the anonymous Santas on street corner, food banks and toy drives. For those of us who do a lot of crafting, this is the time of year that we can give back with a little extra personal touch.

One of my favorite charitable groups is Project Rudolf which distributes holiday goody bags to service members overseas at during the holidays. The bags are simple - a lunch bag decorated by a child, a handful of candy, a handmade ornament and 3 hand written letters (2 from children and 1 from an adult). My husband has been deployed three times so I have an idea how rough it is from the service members being away from their families at this time of year.

I strongly encourage everyone to visit their site, read about what they do, and then get involved! Every little bit helps and it really does have a profound impact on the men and women who receive the bags!

Happy Crafting!

Thursday, October 8, 2009

Thinking Of You Card


This is the time of year when it is so nice to remember our friends and family that may not be close to us. Kids that have gone off to school or siblings who have followed a path that led them to another state. Whomever you want to remember, a simple handmade card can bring a warmer feeling than any store bought card.

The card above was made with a simple $1 stamp, some metallic dots, scrapbook paper and self-adhesive ribbon along the bottom. Using colored pencils, I added a little more color to the stamp. This is one of my favorite cards - at least that I made this year! I am typically not a big fan of brown, but it seems to work here.

Happy Crafting All!

Wednesday, October 7, 2009

Hour Glass Block Tutorial

The Hour-Glass Block that is demostrated in this video from Missouri Star Quilt Co. can be used to create some very dramatic looking quilts. If you notice the quilt in the background on the video was made with Hour Glass and Nine-Patch blocks (which I posted the video about a couple of weeks ago). It is a very simple block that can be used to create very intricate looking designs and Jenny does a fabulous job of teaching how to make this block. Enjoy!


Happy Crafting All!

Thursday, October 1, 2009

Sun Valley Scrapbook Page


Sun Valley Idaho is a winter wonderland that attracts people from all over the world for not only it's winter sports but also its sheer beauty. We are lucky to live only about an hour and a half south of Sun Valley so we can drive up on the weekends to explore the scenery and shops. Earlier this year we did just that.

I chose a simple black cardstock paper for the background because it allowed the white snow, blue sky and green trees to really jump at you. Using dark green accent paper and glittering foam snow flake stickers to add character, these pages are so simple yet so elegant. I didn't have very many pictures to choose from so I decided to group the pictures I did have and added the typed journaling and title.

Again, so simple and so elegant. Anyone could do pages like these without spending a fortune!

Happy Crafting All!

Wednesday, September 30, 2009

Half-Triangle Block

Triangles can be very intimidating if you are new to quilting. Cutting and piecing them seems so tricky when you start thinking about lining up the corners and points just right. Well, the ladies at the Missouri Star Quilt Co. have taken a lot of the mystery out of the Half-Triangle Block in this video. What a wonderful job Jenny does explaining the process and showing, step-by-step, how to make this traditional block as well as a couple of it's many uses.

Enjoy!


Happy Crafting All!

Thursday, September 24, 2009

Thinking Of You Card

The new school year has begun, and a lot of us have children who have gone off to college. This can be a scary time for the student and parent a like. Why not remind your child how much they mean to you with a simple hand made card. The card above was made with a scrap of pretty scrapbook paper, two different $1 stamps from Michaels, some $1 metallic accent dots from Joann's, colored pencils and stamp pads. It took only a few minutes to whip together but what a wonderful way to say hi to your loved one 'Just Because'.

Happy Crafting All!


Wednesday, September 23, 2009

Four-Patch Quilt Block

Here is another wonderful video from the Missouri Star Quilt Co. I love their videos because they explain things so clearly and concisely - much better than I could! The Four-Patch Block is another basic block in quilting making and is very versatile. Have fun with it!


Happy Crafting All!

Thursday, September 17, 2009

A Day At The Falls


One great thing about having family visit from another state is being able to show off the natural beauty of the area I live in. Believe it or not, Idaho has more than just potato fields! Shoshone Falls is wonder that rivals Niagara Falls in size and sheer splendor. When the water is pouring over the rock face, it is an awe-inspiring site.

Obviously I had to show this gem off to my sister and nephew when they came to visit. The resulting pages showcase a simple layout on a black background, really complimenting the vivid colors. Though there is very little embellishment, the striking blue rick-rack at the top and bottom make a bright statement and add to the continuity of the two pages. Personally, I feel it is best to let the pictures and journal entry tell the story, rather than the embellishments!

Happy Crafting All!

Wednesday, September 16, 2009

Nine-Patch Block Tutorial

I recently came across this fabulous series of how-to videos that beautifully illustrate how to make different basic quilt blocks. This series was put together by the ladies over at Missouri Star Quilt Shop. I'm sure you will find it incredibly helpful, and hopefully it will inspire you to get out the sewing machine and some beautiful fabrics and have fun!


Happy Crafting All!

Tuesday, September 15, 2009

Wire Jewelry Video Resource

I've been fascinated with making wire jewelry for the last several weeks, and the results of my experimentations have (mostly) been posted here on my blog. But what was the inspiration that got me hooked on this new skill? A quick visit to Wire-Sculpture.com is what started it all.

Not only do they sell all the supplies you'll need, they are a wonderful resource for wire workers of all skill levels. I signed up for their daily tip newsletter and have not been disappointed - especially when I asked a question and had the answer in my inbox 2 days later!

Plus, the added bonus is they have a collection of free patterns and videos to not inspire but help you get started. I have watched nearly all of them and I love them. They make it look so simple! Here is a link to the video collection.

Happy Crafting All!

Monday, September 14, 2009

Scarves, Scarves, Scarves


Maybe the middle of September is the wrong time to start thinking about this, but I love scarves! I love to crochet them and give them as gifts. They are so simple and quick to make, and now is really the perfect time to start thinking about them - and making them!

Holiday craft shows are right around the corner, and a what better item to offer is scarves that you've crocheted or knit by hand. Think of all the possible variations - school colors, fashion colors, so many different yarns offering different weights and textures. Not to mention, they whip up in no time!

Patterns for scarves are in abundance, but I couldn't help but write my own. Hopefully it will get you motivated to make some of your own! This is a one skein project, using Homespun yarn. I love Homespun yarn for scarves because it is so soft and warm, and it stays soft even after several washings. Watch for sales at your favorite craft stores and you should be able to find it fairly inexpensive.

Materials:
One skein Lion Brand Homespun yarn (6oz)
Size K (2.5 mm) crochet hook

Abbreviations:
ch= chain
dc= double crochet

Ch 21

Row 1: Dc in fourth ch from hook and in each ch across. .
Row 2:
Ch 3*, turn. Skip first stitch, dc in next stitch and in each dc across.
Repeat Row 2 until you run out of yarn. Fasten off, weave in ends.

Fringe is optional.

*= ch 3 is the first dc in each row

Happy Crafting All!

Friday, September 11, 2009

The Importance of Taking a Break

We all know how easy it is to get burned out on work, cleaning, driving, taking care of a family - all of those things we have to do in our daily lives. When we get burned out on the responsibilities of life, we turn to our hobbies - crafts, sports and other activities to take our minds off of the stresses of life.

It is so important to have these hobbies to help us keep our sanity. When we can't take a break from the things that add pressure and stress to our lives, there are a lot of negative consequences. The stress and unhappiness is soon reflected in our relationships, our disposition and, if not dealt with, our health.

For some of us, our crafts are our jobs. There have been times that I can't stand to look at a bead or my sewing machine because I have simply been working too long a particular project or I've put too many deadlines on myself for a show or getting my shop taken care of. When I get to that point, I know it's time to take a break and go for a drive. It's time to deal with something that has nothing to do with work. When I do come back to my project, I feel refreshed and excited about it again.

We can not forget to have some kind of healthy fun in our lives. It is something we need, whether we want to admit it or not, we need that little bit of fun, that break from the normal routine.

Happy Crafting All!

Thursday, September 10, 2009

Family Fun Journaling


Being in a fairly rural area, we have the good fortune to be able to enjoy the outdoors in ways that people in urban areas just can't. Especially when you have access to four-wheelers and miles of open desert! So when we had a Sunday with nothing to do and perfect weather, we jumped at the chance to go get dusty and have fun.

Those kinds of spontaneous adventures usually make the best and most vivid memories. They are the kinds of days that are perfect for journaling. The page layout is, again, simple and filled with pictures rather than embellishments. One of the big differences between this page and my other recent pages is that I used hand-written journaling rather than printing off the title and excerpt.

The only embellishments used were a couple of chipboard tags fastened to the pages with decorative brads and a scrap of scrapbook paper. All the written elements were done on blank tags. The black pages bring out the vivid summer colors in the pictures. So simple!

Happy Crafting All!

Wednesday, September 9, 2009

Quilting Supply Resource

In this current economy, it is always nice to find a reliable supply resource that offers wide selection of supplies. I have heard some great recommendations about Home Sew Inc. They have a huge variety of all kinds of crafting supplies, including a nice selection of material and patterns. Check them out here:

Home Sew Inc

Do you have a favorite quilting supply source? I would love to hear about it! Drop me a line or leave a comment with a link!

Happy Crafting All!

Tuesday, September 8, 2009

Wire Wrapped Ring

The time had come for me to attempt a wire wrapped ring that did not include beads. The result is a little weird, a little rough, a little unbalance, but not too bad really. Considering I was just playing around and experimenting, the fact that it even looks like a ring amazed me!

Yes, I still have a lot to learn, but at least I can see that I am making progress. And that makes me happy. If I can't see improvement in my own work, then I get frustrated and it's better for me to stop for a while. (Keep in mind, this is not the first wire wrapped, non-bead ring - trust me, there is a ton of improvement!)

Keep Crafting All!

Monday, September 7, 2009

Free Crochet Patterns

I'm always looking for new and fun patterns to work from. And free patterns are the best! Recently, I came across a great resource for crocheters in search of fun, functional patterns. Free-Crochet.com has a diverse collection of patterns for crocheters of all skill levels. Patterns are searchable and downloaded in PDF format, which makes them easy to keep track of and print. I love browsing their selection and downloading patterns for future use.

Check out their site: http://www.free-crochet.com/

Happy Crafting All!

Friday, September 4, 2009

Stocking Up

I love Back-To-School time! There are so many great sales going on that it's hard not to stock up on some of the basic supplies. This is the time of year that I will stock up on everything from glue, glue sticks, colored pencils, card stock and printer paper to organizational supplies and seasonal items.

It seems every store has a sale and that is the best time to shop. It seems we are all on budgets these days, some tighter than others. With two teenage boys, my budget stays pretty tight - as my mother-in-law would say, I turn a nickel three times before I decide to spend it! I know it's rough out there. That's why I love sales!

These next few months is generally when I will stock up on everything I might need for projects next year. I look for material in bright spring and summer colors and prints - fabric stores want room for the seasonal tones and patterns of fall and winter. I stock up on scrapbook papers that are marked down to $0.10 for 12"x12" sheet. I watch for the summer themed beads to go on clearance, along with any other summer-themed items that can be used. I think about some of the new things I want to try and start gathering supplies. (I tend to shy away from the fads though - I don't want to spend the money on the supplies and then not be able to sell what I make.)

This is also the time I start thinking about Christmas gifts. My mother loves lighthouses and ocean themes - things that can get difficult to find in the winter months. I start making lists of what I might want to do, and then watch the sales to see what will be least expensive to make. I have a large family to make things for, I need to do it cheap!

Of course, I am a power shopper year round - shopping the sales, clearance aisles and discount stores for supplies. This is how I've accumulated my stash of supplies, my inventory of goodies to create with. Thanks to this time of year, I will usually have what I need (or most of what I need) on hand before I begin my project!

Happy Crafting (and shopping) All!

Thursday, September 3, 2009

Just A Little Note

It makes me feel incredibly old to say this, but I miss getting letters in the mail. I remember as a kid I would always get extra excited as any holiday approached because it meant I would get a card from my grandmother. It made me feel important to get mail.

Now, I would love to find something in my mailbox other than bills and advertisements. Don't get me wrong - email is a wonderful thing, allowing me to keep in touch with family and friends in ways I couldn't as child. At the same, though, I'm sure a lot of people out there would love getting something pretty in the mail.

The card above took me all of 15 minutes to put together. On a blank card, I glued the green rectangle of textured card stock and embellished it with a photograph of a rose (made into a die-cut). Using an inexpensive stamp, ink pad and colored pencil, I added the embellishment to the right of the picture. For very little expense and not very much time, I created a card that will make someone's day when it shows up in their mailbox. Why not try to make a card for someone special in your life, and see just how happy it will make them!

Happy Crafting All!

Wednesday, September 2, 2009

Simple Quilting Resource


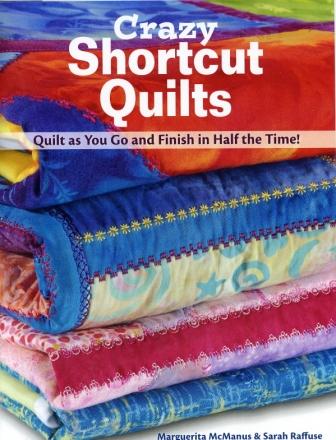
I love when I can finish a throw quilt in a day or two. That is no easy feat, but this book makes it possible. Think traditional crazy quilts on a large scale. It is so easy and fairly quick because you don't really have to worry about precise cutting. I've made two quilts from this book and I'm planning on making a few more for Christmas gifts.


If you are new to quilting and wanting something that can offer some instant gratification, this is the book for you. I've already recommended it to several people and they love it. For more information, be sure to check out the authors website and blog at http://www.crazyshortcutquilts.com/ .


Happy Crafting All!

Tuesday, September 1, 2009

Silver and Amethyst

As my confidence in wire wrapping grows, I'm deciding to try new things - or rather the same design with different materials. The ring above is the first ring I've made that I do actually wear quite often. It is sterling silver wire (26 gauge, so it is pretty thin) with a natural amethyst stone and two accent Swarovski bicone crystals.

It is very simple ring design - the same exact design as the copper rings I posted over the last couple of weeks. However, the thinner wire gives the ring a daintier look. Overall, I am pleased with the way it turned out, and am very happy with the compliments I've received on it.

Wire wrapping requires a lot of practice, but as you get better there is a definite feeling of gratification, especially when you are complimented on your hard work!

Happy Crafting All!

Monday, August 31, 2009

Is It Time To Learn...

...To crochet? I love crocheting because I can create some really great gifts for the people who mean the most to me in my life. We have one friend of the family that still raves about the afghan I crocheted him for Christmas last year. Whatever you choose to make, the recipient will be touched that you made something by hand. The first step in making something, though, is knowing how to crochet.

So to help you get started, I've found some great teaching links. These sites offer detailed instructions on how to crochet, for the beginner!

http://learntocrochet.lionbrand.com/

http://crochet.about.com/od/learnbasics/a/beginners.htm

http://www.learntoknit.com/instructions_cr.php3

http://crochet-mania.blogspot.com/
This site offers instructions and patterns!

Happy Crafting All!

Friday, August 28, 2009

Why We Craft...

One thing I love to ask people, regardless of their profession, is why? Why did they choose that particular line of work? Why do they keep doing it? It's not to make them question themselves or their decisions, but my own curiosity. I like to know what drives people to do what they do, whether it's something to just pay the bills or something they truly love.

For myself, I craft because I love to create. It is only been in the last couple of years that I have tried to sell my creations, even though I've been doing one type of craft or another for as long as I can remember. Some skills I've learned in an effort to make money - like my jewelry making, photography, and (someday) quilting. Others I do just for myself, that other people are generally not allowed to see - my painting is a perfect example. I am a horrible painter, I know I am, but it is something that I truly love because it relaxes me. So when I paint, it is for me and I typically don't show people what I create.

I am always fascinated to hear why crafters choose their various disciplines. The reasons usually have to do either with a love a particular aspect of the craft or just to make money. Whatever the reason, creating something with your hands nearly always gives a person a sense of accomplishment that is intensely gratifying. And it seems the more difficult the process, the more gratifying it is.

So why do you craft?

Happy Crafting All!

Thursday, August 27, 2009

Silver Creek Remembered

I love journaling because it gives me a chance to revisit great days of the not so distant past and allows me to relive some of those wonderful memories. Way back in May, my husband and I took a drive up to Silver Creek which is south of Sun Valley. Naturally, we took our dogs to give them a day of roaming the countryside, exploring to smells and sites.

When I was putting these pages together, I knew I didn't want a lot of embellishment on them. I wanted to remember the day, the sights and the people I was with. Using a lot of pictures is the best way to capture that give a lot of visual reminders. The journaling and title element for the pages were both done in Word which allowed me to preserve the written memories in a more legible script and I was able to design the pieces in a way that complimented the layout. The only real embellishment on the pages are the strips of self-adhesive ribbon on the outside edge. The ribbon adds interest and a different dynamic without competing with the pictures.

It's not hard to create a lovely page to preserve memories without losing those memories to the fancy embellishments. Pages like these prove that less really is sometimes more!

Happy Crafting All!

Wednesday, August 26, 2009

Make A Quilt With Me, Wk 6

We are in the home stretch. Everything for your beautiful baby quilt is done - except the binding, the very last step.

Attaching the binding can be a very frustrating process for new quilters. I have been quilting for a few years and it is still the only part of the quilting process I truly dread. Rather than drag this out, lets get to the instructions so you can finish up that quilt!

First, you will need to get out those four 2.5" strips of Fabric B that you set aside all those weeks ago. You are going arrange them with right sides facing, to create an 'L' shape. Then you will draw a diagonal line as shown in the picture below.

Join the two pieces by sewing on the line you marked. Then trim the triangle of excess fabric and press the piece open. Repeat this step until you have all four strips connected into one long strip. Where you connect the strips should look like the picture below. Trim the ends at a 45 degree angle.

Once you have all four connected and the ends trimmed, it is time to press your binding. Fold the binding in half as you press to create a strip of material that is double thickness with the right side facing out. (This is where you can see the reasoning for connecting the strips with an angled seam. Once the fabric is folded in half, the seam will not over lap which reduces the bulk that you will be sewing through when you attach the binding.)


I have been contemplating the best possible way to explain the final binding process. I have realized that I probably could not write instructions that would be clear enough to guide you through this very important step. So, when you have finished assembling your quilt binding, please watch the video below with Eleanor Burns showing you how to finish binding your quilt.


The very last step to any quilt is sign it. I use a fabric marker and will write my name, pattern name, date the quilt was made and who it was for on the back of the quilt, generally along the binding. I like to keep the signature subtle and small on the back.

Now that your quilt is completed, it is time to sit back and enjoy the efforts of your hard work. You should be proud of yourself. It can be frustrating, but hopefully you made it through the whole process and have a beautiful baby quilt for your own little one or to give a very special gift.

Congratulations on completing the quilt! I hope you had fun!

Happy Crafting All!

Tuesday, August 25, 2009

Copper Bauble II

After I made the simple cocktail ring show cased in last's jewelry post, I knew I could do better. So, after a few deep breaths and some searching through my bead stash, I got back to work.

The result was this more refined and proportionate looking ring. By using smaller beads and the same techniques as last week, I was able to create a ring that I would actually wear - which is a first! Most of my experiments so far have not been all that great, so one I would wear is an improvement!

I am starting to really enjoy creating these rings and have been looking through my beads for the same appropriate size in more dazzling color combinations!

Happy Crafting All!

Monday, August 24, 2009

A Fair Challenge

At the beginning of August, the community I live in held it's annual county fair. I will admit that I was surprised to see some interesting exhibits that I really did not expect to find. Beyond the carnival rides and food, the animal displays and largest vegetable or flower competitions, there was also a wide variety of home arts and crafts on display.

The quilting, jewelry, photography, knit and crochet displays were amazing. There is so much talent in this area that doesn't always get noticed. The sad thing is there weren't many entries in each of the home arts categories. So I decided to challenge myself.


I made the decision to enter next year's fair competitions in as many categories as I can. (The more I enter the better chance I have of winning! hehe) I am going to start with a crochet piece. I choose the lovely 1949 afghan pattern above as the first thing I will make. If I am satisfied with how it turns out, I may enter it. If not, I will make something else and go from there.

I have about 10 months to make as many items as I can and then decide on which should be entered. I will try to update everyone on my status about once a month, and I may even ask for your help in the making the final decisions.

Happy Crafting All!

Friday, August 21, 2009

The Importance of Failed Experiments


Whenever I decide I want to try a new crafting discipline, I do my research. I read a lot of how-to's and instructions, try to find instructional videos, look into the cost of supplies and try to determine whether or not it could be sold at shows or in my online shop. The final step before jumping fully into a new craft is the experimentation.

I personally believe that the failed experiments while I'm learning a new skill are more important than the successful experiments. When I fail, I learn something, whether that it's a particular method just won't work for me or, as is the case with the pictured ring, I will need a lot of practice before I try my own designs for something. The ring is a result of finding beautiful jasper tube beads that I thought would make a lovely ring. Unfortunately, the limited experience I have with wire wrapping resulted in a failed experiment. But I'm not about to give up. I am going to continue working with wire until I can make the ring the way I envisioned it.

Sometimes a failed experiment will even teach me that I would rather appreciate someone else's hard work than try to make something myself.

Ultimately, no experiment is a complete failure if you learn something from it. The end result may not be what you wanted, but if you learned something about the skill or yourself, than it can not and should not be called a failure.

Happy Crafting All!


Thursday, August 20, 2009

Birthday Wishes - Classically Simple

I love this birthday card. It is so simple but classic with it's textured background, the rolling letters stamped on simple white paper, self-adhesive ribbon and the beautiful metallic butterfly in contrasting pink. This card design could easily be altered to make it a little more masculine or more feminine. As it is right now, it would be perfect for a woman who loves to be active or loves the calming ocean tone the textured paper lends to the project. To make the piece a little more interesting, I used double-sided foam tape to raise the birthday greeting and left the butterfly tag loose, adding dimension to the piece.

Again, simple, classy and handmade in less than a half hour. It's sure to make someone smile!

Happy Crafting All!

Wednesday, August 19, 2009

Make A Quilt With Me, Wk 5

We are in the home stretch now! Of course, this is also where the quilt making can get a little tricky and very frustrating. These last steps will require a lot of patience. By now you have you quilt top completed and pinned to the batting and backing in a 'quilt sandwich' and you are ready to start quilting through the center.

One of the easiest ways to do the actual quilting is what's called 'stitch in the ditch.' This basically means you will be stitching next to (in the ditch) your block seams. I personally love this method because I have a very inexpensive sewing machine and straight lines are easier to do than trying to do fancy curves and designs.


Unroll your quilt on one side, just to the center seam. I prefer to start stitching in the center of the quilt and work my way out. The rolled part will stay under the throat of the machine as you sew a straight line down the center seam.

The biggest key here is to go slow. You may want to drop your dog (feeder) feet so you can guide the quilt through the throat and past the needle. I found that it helped me to leave my feet up - they aided in moving the material through a little more smoothly with less effort on my part.

For this week, take your time and sew all the straight seams between each of the 36 blocks. On the back, you will notice a grid pattern take shape. Once you have all the vertical seams sewn, rotate the quilt one quarter turn. This will make the vertical stitching you just finished horizontal. Roll half of the quilt and repeat the process. Make sure you also do the seam connecting the border to the squares.

That's it for this week. Again, TAKE YOUR TIME! Keep a slow, steady pace as you move the quilt through the machine and before you know it, it will be done.

Now is when you should be getting really excited! Next week will be the final step and once you've completed it, you'll have a beautiful quilt you can be proud of. Until then....

Happy Crafting All!
Tuesday, August 18, 2009

Copper Bauble


A simple cocktail ring seemed a good place to start on wire wrapping journey. There is not much concern for swooping curves and bends in the wire and only a couple of beads to adorn it.

The ring above took about 20 minutes to create. It was more challenging than I expected simply because getting the beads to stay where I wanted them on the wire and getting the wire stay on the mandrel can be a daunting task. But I managed it. The finished ring is actually very nice even if the beads I chose where a little too big for a ring. That is what experimenting is for though: Making mistakes and learning from them.

Happy Crafting All!

Monday, August 17, 2009

Cute and Hip-po!


Here is another adorable little creation straight from the pages of 'Tiny Yarn Animals' by Tamie Snow. This little hippo was whipped up in just a few hours and would make a great gift for someone who collects either hippos or amigurumi.

The book, 'Tiny Yarn Animals,' has a total of 20 amigurumi patterns including this little guy, the lamp I showed you last week and other adorable little critters such as a koala, lemur, hedgehog, bear, octopus and fish. The patterns would be great for any experienced crocheter. (Those who are new to crochet may find the lack of instructional pictures a little frustrating.) Nicholas Noyes did a fantastic job photographing the finished projects in ways that give each little critter it's own personality.

Happy Crafting All!

Friday, August 14, 2009

Pictures To Die Cuts


If you have ever ventured through the paper craft sections of you favorite craft store, you'll undoubtedly have seen the lovely die cuts available for your projects. But why buy them when you can make them at home. It's easier than you think.

Above is the perfect example of how easy it can be. I used a picture of a blooming rose that I took at a city park, cut around the rose and made my own rose 'die cut' perfect for cardmaking or even scrapbooking. If you don't happen to have a collection of pictures to use, you can always search domain-free images to use in your projects - simply download the free images and cut them out.

Obviously, using something like a Cricut system would be easier, but those can be expensive. Using my own pictures, the only investment I have to make is in printer ink, paper to print the pictures on and a pair of sharp scissors. And with the economy the way it is, saving money anywhere you can is a definite plus!

Happy Crafting All!

Thursday, August 13, 2009

Birthday Wishes - The Simple Way

Sorry for the sideways picture, but for some reason the Blogger likes to turn some of my pictures when I upload them.

Anyway, this is another example of a super simple birthday card. All I did was glue a piece of lavender paper to the front of a blank card, added a stamped cut out which I used colored pencils to add some color to and some simple glittery flower stickers. The stamp I used was another of (my favorite) Michael's $1 stamps and the stickers I found at Wal*mart for a $1.

I love to make these cards because the handmade aspect makes them special. However, handmade paper crafts don't have to cost a fortune. Always check $1 bins at your craft stores, a lot of dollar stores will have craft sections (you just have to look for them) and watch for sales and coupons. Once you accumulate a stash of simple stamps, papers and stickers, you'll be able to whip out these cards in no time!

Happy Crafting All!

Wednesday, August 12, 2009

Make A Quilt With Me, Wk 4

If you have been following along with me, by now you have sewn all your blocks together in the pattern of your choice. Hopefully it all came together fairly easily for you and you are ready for this weeks instructions. Now, because lasts weeks instructions were a little involved, this weeks homework will be fairly easily.

The first step this week is to out four strips of Fabric B which were set aside when we started. You will need to sew one strip to each side of the quilt, adding the only border to the quilt. Press the top to smooth it out. Once you have that done, the top of your quilt is finished! You should be proud of yourself! You are half way to having a completed quilt ready for your own little one or to give as a gift.

Now, get out your backing material (Fabric D), and your batting. It is time to make your quilt sandwich. You are going to need a fairly large area to work. I will generally lay everything out on the floor at this point, however if you have enough space on your dining room table, I would recommend using that surface.

First, you'll need to press your backing material flat. Lay it out on the work surface. Then open up your batting, unroll and unfold it, smoothing it over the backing material. Use your hand to smooth it over the entire backing material; it will sort of adhere to the back material and not slip too much. Next, lay your quilt top over the batting and smooth it down with your hand as you did the batting.
Once you have it all smoothed and flattened, grab your safety pins and start pinning through all three layers. I prefer to use safety pins for this step because, even though they are a little more work to get on and off, I don't have to worry about stabbing myself on a straight pin while I'm working.
As you can see, I put one safety pin in the center of each fence rail block and along the border. You really need to use a lot of pins so that your materials don't shift and move around as you are quilting. Nothing is more frustrating than working so hard to quilt the layers together only to find out it shifted and won't lay flat once it is done.
After you it is pinned, trim the backing and batting to 1.5" - 2" larger than the quilt top, all the way around. Then, starting from one side, start rolling the quilt like cinnamon rolls. Go ahead and roll the entire quilt and set it aside until next week. As I said, this week is pretty simple. It is very important though, that you roll the quilt from this point on. If you fold the quilt in half, you risk shifting the material or allowing the batting to bunch or crinkle. This can cause problems when you are quilting with your machine.
So that's it for this week. Now you have a good idea of what your quilt look and feel like. You can feel the actual weight and texture of finished quilt. Next week we will do the actual quilting through all three layers of your quilt sandwich! Until then...

Happy Crafting All!!

Tuesday, August 11, 2009

Silver Leaf II

Again, I couldn't resist the call of natural inspiration. This time I utilized leaves cut from white shell, lovely green glass beads and silver accents and chain.

I love the this necklace and have worn it several times (acting as my own advertising!). Each time I've worn it, I've received several compliments. This is another that will soon be listed at AutumnBlossoms.com in plenty of time to make it a perfect Christmas gift!

Happy Crafting All!!

Monday, August 10, 2009

Counting Sheep

I love creating little stuffed toys. The pattern for this adorable little guy came from 'Tiny Yarn Animals' by Tamie Snow. I've finished a couple of the patterns in the book and am very pleased with the results. I would highly recommend the book to experienced crocheters. The pictures of the finished animals are fun and inspiring.

This little lamb took me about four hours to complete, start to finish, and is made of inexpensive worsted weight yarn. Cute and durable - a great combination!

Happy Crafting All!

Friday, August 7, 2009

Alternate Resin Hearts

Last week I showed you a simple and patriotic resin heart pendant from my Fourth of July inventory. This week I wanted to show you how easily the same basic pendant can be altered for a completely different look.

While last weeks pendant was highlighted with star confetti and dyed resin, this week's examples illustrate how something as simple as glitter can offer two distinctive looks. The pendant on the left was another big seller on the Fourth of July because of it's patriotic theme. The pendant on the right, however, is a solid glitter for year-round wear.

Using glitter offers you an easy and inexpensive way to create sparkling accents for day or evening wear. Catching the light beautifully, the glitter makes these fun for all ages while keeping the price of the piece cheap to make - and in return, cheap to sell!

Happy Crafting All!

Thursday, August 6, 2009

Super Simple Birthday Card

I have three August birthdays in my immediate family - much more once I start counting in-laws and cousins. So over the next couple of weeks, I'm going to share some of the super simple birthday cards I've made to help celebrate these special days.

This card took me about 15 minutes to create. I used a neat birthday paper, a $1 cupcake stamp from Michaels, colored pencils and glue. Granted, the picture is not the greatest, but you get the idea of how quick and easy this card was to put together. Now it is ready for when I need it.

If you were able to find a similar birthday paper in a 12"x12" scrapbook sheet, you could easily make multiples of this card to always have on hand.

Happy Crafting All!

Wednesday, August 5, 2009

Make A Quilt With Me, Wk 3

By now you should have all your quilt blocks ready to go. Last week you had your fabric washed and pressed; cut into strips and those strips were sewn together and then cut into your ready-to-use fence rail quilt blocks.

This week is when the fun really starts. Gather your blocks and lay them out on a work surface to design the look of your quilt. It is crucial to know how you want your quilt to look finished before you sew any further. If you make a mistake, you can fix it by taking the blocks apart and resewing them, however that can be hard on the material and it is time consuming. That is way knowing what you want the finished piece to look like before you start is so very important.

There are two popular ways to use fence rail blocks, the first is a very traditional look achieved by alternating between vertical and horizontal lines in the blocks giving the quilt a stair-step look, as showing below:
The second is the one I prefer because of the cute pinwheel-esque design that is achieved with with teal and purple fabrics, as shown below:
To me it gives the quilt a little more personality and focus. However, the design is your choice - I just wanted to illustrate a couple of the options available. Play with your blocks until you find the look you want. Now we get to start sewing your blocks together.

There are two ways to do this:

1. You can sew strips of blocks together, six block long, and then sew your six strips together to form your quilt top.

2. Sew sections of blocks together and sew those sections together to form your quilt block.

I prefer the latter, especially when using the fence rail block to make the pinwheels. By sewing four blocks together to form a pinwheel, I know that I am correctly placing the blocks for the pattern. Also, I find that sewing long strips of blocks together can make it somewhat cumbersome and difficult to line up seams at the block corners so I have always tried to construct smaller sections that will be sewn into the whole. (Hopefully that makes sense.)

Once you have finished sewing your blocks together, sit back and relax, you are done until next week. Are you feeling good about the progress you've made? You should! Your quilt top is nearly completed. Next week you'll finish the top and prep the piece for the actual quilting. Trust me, it won't be as difficult as it sounds!

Happy Crafting All!


I love this layout simply because