Friday, December 21, 2012

Happy Holidays - I'm taking a vacation...

That's right - I'm taking a little vacation from the bloggering to enjoy the holidays and start planning what sorts of projects I will want to tackle next year. So there will be silence from me for the next two weeks. I will be back on January 7.

I hope everyone has a wonderful holiday season and enjoys the time with their families. Don't forget, this is the season of giving and togetherness. Give what you can to those who need it, shop local crafters and artists for last minute gifts and try to enjoy what you have.

Family, friends and those people that are most important in your life will make you more happy than material possessions - try to remember that when you open that one horrible gift you never wanted. Someone put a lot of thought in to getting it for and that should mean more than the gift itself.

Happy Holidays - see you next year!

Wednesday, December 19, 2012

The Cozy Gift

There is always that one person you have a hard time shopping for. For me, it's my brother-in-law and his wife. They live about 100 miles away and much different interests than the family that is closer. They are always the most difficult to shop for.

This year, after much thought, and hair pulling-out and stress and asking the hubby "what do get them?" I decided on a simple personalized gift. I purchased a warm fleece throw while they were on sale. Next I found a coordinating piece of felt and cut out their initials and appliqued it to the blanket. And PRESTO! A personalized gift that shows thought, care and sentiment and is useful to boot.

It takes only a little bit of sewing knowledge - and I hand stitched it.This is something that can be done in a night. If you want to personalize it further, make a no sew blanket from fleece or a minimal sew blanket with fleece and flannel sewn together with a applique personalization.

Sorry the picture isn't the greatest. It was taken on my phone before I went on a gift wrapping rampage and couldn't get a better picture!

Tuesday, December 18, 2012

The Practical Gift

Families are getting busier and busier. It can get hard to keep track of everything that needs to be done. Some times what we all need is that visual reminder of what what is coming up for the week. Or like me, to let the family know what I am planning to make for dinners for the week.

So I got an 11x14 frame, some scrapbook paper, ruler, sharpie, glue and pretty stickers to create a cute dry erase board. I got everything put together, divided the page in to eight sections, one for each day and one section for notes.

This is such a cute little functional gift for the busy people in your life. We can all get so overwhelmed with everything we have to do that we forget some of them.

The best things about this type of gift: it is affordable, it is functional, it can be personalized to match and decor, it is reusable because dry erase markers will wipe right off. This is another gift that doesn't take long to put together and shows a lot of thought on your part.

Monday, December 17, 2012

Sentimental Picture Gift

It is a little scary to think about, but we are eight days from Christmas! People may be starting to panic trying to figure out gifts for those hard-to-shop for loved ones. Or how to fit one more gift in to an already tight budget. You don't want to give some generic gift that will be forgotten about or re-gifted next year.

One thing I love to do as an affordable and very meaningful gift is a scrapbook inspired framed picture. There are so many possibilities if you have a huge stash of supplies. If you don't, not to worry - this is still a fairly inexpensive gift that really doesn't take long to create.

What you need:
- picture frame (I used 8x10)
- pictures (I used two trimmed to fit, but you can use as many as you can fit)
- scrapbook papers
- sentiment stickers
- scissors
- glue
- ruler or paper cutter

The process is super simple and pretty straightforward. Trim your main background to fit the frame. Deciding on your layout may take awhile, but take the time to play with it, see what you like and don't glue anything down until you are sure you love it. I trimmed a strip of coordinating paper to put the sentiment on and help it stand out and trimmed the pictures so they would fit well.

I used an inexpensive frame from my local Walmart. For the papers and sticker sentiments you can either go to a craft store and buy individual pages and matched stickers. Or you can do what I did - check out the stationary/gift wrap area of your local Walmart or Target. I paid $1 each for a set of coordinated papers (that had several pages in it) and a sheet of matched stickers. Total, after printing the pictures was about $6 for this project. It may not cost a lot, but it will surely get an "AWWW" when opened!


Thursday, December 13, 2012

Sentimental Greetings


In this time of tight budgets and scattered friends and families, it can be difficult to send someone you care about a little something. It gets expensive, especially in large families. A Christmas card allows you to send that tangible reminder to someone that you are thinking about them at this hectic time of year.
The easy way is to just go buy a box of cards and quickly breeze through them to get them in the mail. Personally, since it is the only thing many of the people in my life will get, I prefer to make my cards and have made them for the past several years.

You really don't need to do anything elaborate. This year my card consists of scrapbook paper trees (the shape coming from a cookie cutter) topped with a glittered foam star sticker, a band of red textured paper and a stamped piece of white paper with the seasonal greeting. I made 15 cards in about two hours in one evening. Te majority of the time was spent tracing and cutting out the tree shapes.

This is another great project that you can get the kidlets involved with. Why not do hand print cards by tracing hands on different fun papers and layering the hands of everyone in your family? Or let the kids decorate with stickers, crayons and paints for keepsake cards to grandparents, aunts and uncle. 

Everyone I have sent my cards to always seems so grateful for the thought and time put in to the cards. That is why I love doing this every year. We live in a time of instant communication between text messages, phone calls and social media, it can mean a lot to someone to receive a handmade card. 


Wednesday, December 12, 2012

Outside the Cookie Cutter


 Every year I like to make some sort of new ornament for our tree. Since I've been fascinated with felt this year, I decided that would be what I would use.

I knew I didn't want to do the cookie style ornament that are so popular in felt. Of course the idea I had wasn't too far off from the cookie idea.

What I did was take my felt and some of those inexpensive, big plastic cookie cutters and cut out two of each, stacked them and sewed them together.

For the candy cane, I opted for some bling and used some red rhinestone cup chain. It glitters so nicely in the light. I really like the non-traditional look of the candy cane. Rather than the normal spiral-inspired stripes, I chose to simply outline the whole cane.

As for my star I went for a more classic look with the string of small pearls surrounding the set white start and then the entire outer border.

Personally, I really like the way these turned out. Tweaking a basic idea to create interesting new pieces. Felt cookie cutter ornaments made to look like frosted cookies have been done a million times. But my adding a pinch of ingenuity, I've made something different, classy and timeless to hang on my tree.

With the simple tweak of an old idea, the creative possibilities are endless and I look forward to making more!

Tuesday, December 11, 2012

Decorated Dining

 I don't have a fancy-schmancy dining room that I can keep pretty for special occasions. Nope. I have a single dining room that must function as such on a daily basis.

Does that mean I can't decorate it for the holidays? Absolutely not!! :)

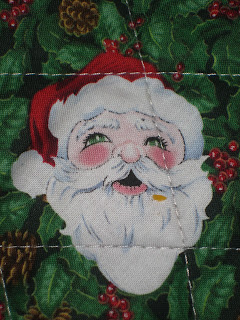
My wonderful mother-in-law gave me some adorable quilted place mats as an early Christmas gift. I love them and could not wait to get them on my table. You can see the little Santa's that offer their jolly laugh.

To complement the Santa's, I wanted a centerpiece that could continue the holiday spirit. I took my glass cake plate, filled it with glass bulb ornaments that I made a couple years. They remind me of oversized candies. 

This is a really simple way of bringing your decorations to a functional area without impeding on the space. If you don't have a covered cake plate, use an over-sized clear bowl. If you don't want to take the time to paint ornaments get some inexpensive bulbs from your local dollar store in colors that will compliment your decor.

Considering this is the only holiday I really get excited about, I love it when I find a new way to add some cute decorative touches to the house. I get even more excited when I can use supplies I already have in the house. It just proves that you really don't need to spend a lot to create a beautifully decorated home.


Monday, December 10, 2012

Greetings on Display

 With the holidays quickly approaching, we will finally start receiving something other than bills in the mail! For a long time, I would just display cards on whatever flat surface I could find and figure that was good enough.

This year, I decided I would actually make a card holder. Best part? It did not involve my sewing machine. I can't technically call it a no sew project because there was a little bit of hand stitching, but nothing really challenging.

I started by using fabric glue to adhere the silver ribbon to the wider red satin ribbon. Once that was dry, I got out a few wooden clothes pins and, on the back of the red, I glued down one side of the clothes pin. Next, I held the pin open, spread some Fabri-Tac and pushed the ribbon in to the open pin and let it close. This created the wavy look to the hanger and made a soft place for the cards.

Finally, I made the red bow for the top of the hanging out of the same ribbon that is behind the silver. I attached it to the front at the same place as a small split ring I had in my jewelry supplies.  At the bottom, I added three little jingle bells to add a little bit of weight to help keep the ribbon hanging straight.

Since these pictures were taken, I have filled the baby up. You will definitely want to pay more attention to what you are doing than I did. I accidentally my bow and hanger to the wrong end. It does work for me, so the only issue this created was the cards don't hang below the clothes pin. For me it's not the end of the world, but if I was to make another, I would make sure I put it together the right way!

Anyway, I think this is a nice way to highlight the cards that we receive, especially considering how popular picture cards are getting to be.