Friday, March 27, 2009

T-Shirt Design


My stepson needed a birthday present for his girlfriend last week. Of course, being a 17 year old boy, he was broke! LOL A few days prior to her birthday, he came to me with an idea for a t-shirt that he wanted to make for her inspired my her cell phone background. I was thrilled that he chose to do something crafty and hand made for her.

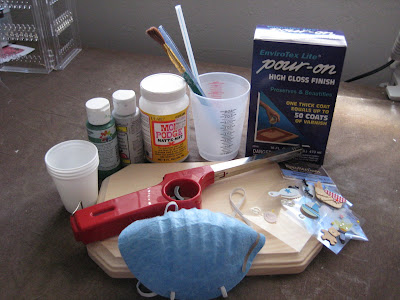
After a trip to Michael's, he has his supplies. It didn't take long for him to create the design and he was ready to get to work. He was determined to do the whole thing by himself, so I was relagated to the role of supervisor. I am proud of him though - he created a gift that she loved. (The front is pictured above, the back below.)

Personally, I'm glad that he was inspired to do something handmade. It makes me feel that I've had a positive influence on him, with all my crafting ways! hehe

Happy Crafting!

Thursday, March 26, 2009

A Little Friend

This little guy doesn't have a name yet, but he is the latest needle-felted bear that I have completed. Thankfully he actually looks like a bear! LOL (Leo really was a bit lionish for a bear. hehe) He stands barely 2 1/2" tall from the bottom of his little foot to the tip of his ear.

Currently I'm working on another needle-felted project, and I need to finish a quilt, so the next couple of days will be busy - especially with more home improvement projects to take care of this weekend. Whew! So much to do - and I still need to come up with a name! Suggestions will be happily accepted!

Happy Crafting!

Wednesday, March 25, 2009

A Very Basic Resin Tutorial

This is a very basic tutorial on making a resin coated plaque. You'll have to forgive me if the pictures are not very clear. I want to preface this by saying make sure you read the instructions included with your epoxy resin. The most important part of this project is a WELL VENTILATED AREA - epoxy resin has a very strong odor and if you are sensitive to smells can cause migraines and nausea. I would suggest pouring resin in a garage or screened in porch, where there is excellent air flow and protection from any flying dust and debris. Personally, I am not that sensitive to the smell, so I am fine with pouring the resin in front of an open window. But again, take your personal needs into consideration when you start this project and only pour in a WELL VENTILATED AREA and away from children!

Now that that is out of the way, let's start with a supply list:


You will need:
  • A wooden plaque
  • A two-part epoxy resin - I have found Enviro-tex works really well on plaques and large flat surfaces.
  • A disposable cup for measuring - ones similar to the one pictured can be found in craft stores and are very inexpensive. If you can't find one like that, disposable plastic cups and a kitchen scale will work. (**If using disposable drinking cups, make sure it is large enough for the amount of resin you are pouring as well as very sturdy - DO NOT use the cheapest possible cups, I'll explain why later.)
  • Something to stir with that is disposable - I prefer to use plastic knives, but clean popsicle/craft sticks work equally well.
  • Face mask - I found mine in the painting section of Wal-mart, it helps a little with the odor.
  • Gloves - I don't wear them but I do recommend them.
  • Paints
  • Pictures - copies or original is up to you
  • Stickers and other embellishments
  • Mod Podge
  • Paint Brush
  • A drinking straw
  • A lighter designed for barbecues or fireplaces (like the one pictured)
  • Four (4) small disposable cups - like the little bathroom Dixie Cups
  • An inexpensive poster board, wax paper
The Process:

1) The first step is to decorate the plaque however you wish. I painted mine and embellished with stickers to create a fun welcome sign for by my front door. I have seen people create scrapbook pages on the plaques by gluing down pretty scrapbook paper and then layering on pictures, stickers, ribbons and other embellishments. (Faceted gemstones don't work, so don't bother with them. Once the gem is covered with resin, the facets (which gives the gem its sparkle) are no longer visible and it will just look shiny - no light play or reflection.)

If you choose to include pictures, they must be sealed with Mod Podge. Once you have your plaque designed and affixed, give it a good coat of Mod Podge, paying close attention to the corners and edges of the pictures. If they are not properly sealed, the resin will seep under the picture and will turn that area of the picture a little translucent. This will be noticeable and can be frustrating. Coating the whole top of the plaque is a great idea, to to be sure you have covered everything.

(**A QUICK NOTE ON PICTURES: If you choose to print copies of pictures from your computer, I suggest printing them on plain paper, adjusting your printer settings for the best possible setting (usually found under the print properties). I have printed pictures on glossy photo paper and when I coated with Mod Podge, the ink on the picture started to smear - even though I had printed them the day prior to sealing. Just thought I would mention that so no one else has to deal with the frustration! LOL)

2) Once your plaque is painted and embellished and your sealer has completely dried, it's time to prep your pouring area. I cannot stress enough how important it is to have a WELL VENTILATED WORK AREA. Plus, this is NOT a process for little kids. If you want the kids involved, have them decorate the plaque, but pour the resin once they are in bed.

You will want to protect your work table because resin is runny and permanent. I prefer to use the inexpensive poster boards that I can use for a couple of pours and then toss. However, if you have wax paper handy, cover your work area with it. When I use wax paper, I like to tape it down so that it doesn't shift and move, leaving a gap for the resin to seep through and ruin a table. You will also need a work area that you will allow you to see all sides of your plaque. Once resin is poured on it, you really can't pick it up and turn it. (This is another reason I like to use poster boards, I can just rotate the whole board to see all sides of my project.)

Once you have your area choosen and protected, set the small Dixie Cups in such a way as to elevate the plaque:

And place your plaque on top:


3) Now it's time to mix your resin. One thing to keep in mind is that the smallest box of Enviro-Tex is designed to cover one square foot. What I like to do is get out a piece of 12x12 scrapbook paper and make sure that it will fit. (This sometimes requires math.) If you are working with small pieces, make more than one or do not mix all the resin so that none is wasted.

Enviro-Tex is a one-to-one epoxy so you will be mixing equal parts of the epoxy and the hardener. This is where having the mixing cups with the measurements on them come in handy, though a kitchen scale works just as well. (**However if you using a kitchen scale and plain plastic cups, use special care - once the two parts are mixed they begin to give off heat. The heat generate by the two parts bonding is enough to melt the cheap plastic drinking cups. If you unsure, have the cup you are mixing in inside another cup, or 2. Use your best judgement - it is best to have the higher end plastic cups or measuring cups though.)

The epoxy and hardener mix and pour best at room temperature. I have gotten in the habit of immersing each bottle in hot tap water.


Watch how they move in the bottle - when they are cold the air bubble in the bottle will move slower and the liquid will seem thick. When they are at a good temperature, the bubble will move more quickly and the liquid will seem thinner - I really hope that makes sense.

When they are both ready, pour into measuring cup, carefully making sure to have equal parts of epoxy and hardener.


Then mix, mix, mix as per the included instructions. It will look bubbly, which is ok.


4) Now it's fun time - Time To Pour!!! This is also the messy part. I found it is a little better to pour a little resin at a time. It is easier to control if you are dealing with spreading small amounts at a time. My personal preference is to start pouring in the middle and work my way out to the edges.

(*The embellishments I used were dimensional, therefor I did not worry about sealing the edges. It added to the look of the plaque. One thing to be weary of when using dimensional embellishments is air bubbles coming from beneath the elements. Watch them carefully and try to get resin under them as best you can.)

It is very important to make sure everything is covered. I move the resin around with the plastic knife - which I find much easier to use than craft sticks. Craft sticks work great, however, as you are working with the resin - mixing in the cup, controlling how you pour it, and spreading it - the resin tends to get all over the craft sticks. With plastic knives, on the other hand, you have a handle and the overall length is a bit longer than craft sticks. Both work fine, but you should expect a little extra mess with the craft sticks.

Spreading resin is a bit like frosting a week old pancake with gravy. It is vital that you completely cover the top and don't worry about it spilling over the sides. The resin will want to drip off, which is fine. The best way to control it is to pour small amounts of resin at a time and watching as you spread it. Once the top is covered, work on the sides, "frosting" each side completely. This will help give the plaque a more finished look.


5) Once the resin is poured and the sides are "frosted", you will notice air bubbles in the resin. This is hard part - are at least the part I hate the most. The bubbles will not rise on their own. There are two ways I have found that are effective to getting the air bubbles out:
  1. Grab that drinking straw, hold it 1-3 inches above the resin and blow in steady, even breaths. This is one that I started with - it works but it is my least favorite of the two methods simply because it puts you fairly close to the resin odor and I tend to get lightheaded after more than 2 minutes of deep breaths through a straw.
  2. The method I prefer to use the lighter. Use the longer lighters, designed to light barbecues and fireplaces - they are more comfortable to hold, keep your fingers away from the flame and won't burn your finger tips after 10 seconds like most lighters will. Hold the lit lighter at an angle over the resin and gently move it over the plaque in slow sweeping motions. (*As a side note, I have never had Enviro-Tex catch fire, however you should always use basic common sense when playing with fire!)


Once you are satisfied that you have all the bubbles out of it, it is time to stand back and enjoy your work. As a general rule, I let the resin cure for at least 24 hours before I start trying to move it.

There will be small bumps on the back of the plaque from the drips. All you have to do is grab your Dremel and sand them off - or use the slow method of a little sand paper. Attach a hanger and hang wherever you want - your are done!

Ok, so this tutorial ended up a little bit more in depth than I initially thought it would - or at least a little more wordy. Sorry for that, but I just like to make sure that I answer any questions that might arise. If I missed anything, please comment and let me know! (Keep in mind that I am not an expert, I am just sharing information and tips I have gathered in my own work with resin. If I can't answer a question, I will be more than happy to help you find a resource that can answer it!)

Good luck with your resin plaques and Happy Crafting!

Molly (aka A Big Distraction!)

This is Molly, my Valentine's gift from my hubby. We went to the local animal shelter and rescued her on. She is about nine and a half months old now, and like all puppies she needs a lot of time and training - which leaves me very little time for crafting. Her first night here, she was exploring the house, wandered into my crafting room and found a crochet UFO. I have to admit it was so cute to see her walking into the living room with the little stuffed animal leg (she found a dog I was working on LOL) in her mouth and trailing a yarn tail behind her! Of course it also meant that she was going to need chew toys that were not my craft supplies and projects!

Molly is an Aussie Cattle Dog (Blue Heeler) which are very smart working dogs. She is so hyper that I feel she needs a job. Once the weather is a little warmer, I think I will have my DH build me a doggy agility course in the backyard and I will work with her on that. Fortunately, she is learning a routine and is starting to let me get some crafting done again. Hopefully next week, I will be able to start posting on a regular basis again!

The picture below is from right after we got her spayed. I love my little demon dog, but with all the boy dogs that live around my house, we don't want any little puppy surprises! I had to post it because she looks so sad and violated after the surgery!


Happy Crafting!

Friday, March 6, 2009

Sick for a week....

...And it was horrible! I hate being sick, but I think I am finally on the mend, which is good. The worst part about being sick is that I get almost nothing done. This last week was no exception. I hope to make up for it next week though!

I finished a new needle felted bear that I will post next week, a long with a baby blanket that should be finished up with weekend. (Crocheting is a great thing to do while sick - just gotta remember to wash the blankie when it's finished!) I am also working on a simple resin project with a tutorial! I've had a few people asking me to write a basic tutorial on working with resin, so I'm writing a basic tutorial on making a resin plaque. There will hopefully be much more than that - provided I can stop coughing long enough to type! LOL

Until next week...

Happy Crafting!